Unlock the Secrets of Stunning Photography: Mastering Lighting Techniques Like a Pro!
Lighting is often considered the backbone of photography. It has the power to transform a simple image into a breathtaking piece of art. Whether you are a beginner picking up your first camera or an experienced photographer looking to refine your skills, understanding how to manipulate light is essential. This article aims to provide insights into various lighting techniques and setups that can elevate your photography, regardless of your experience level. From mastering natural light to experimenting with artificial sources, we will explore the nuances that make lighting an art form in itself.
Understanding the Basics of Photography Lighting
At its core, photography lighting can be categorized into two main types: natural and artificial light sources. Natural light comes from the sun and varies throughout the day, while artificial light includes any man-made lights such as flash units, LED panels, or studio lights. The impact of lighting on mood, color, and composition cannot be overstated. The golden hour, characterized by soft, warm tones, can evoke feelings of nostalgia, while harsh midday sunlight can create stark contrasts that add drama to an image. Understanding these elements allows photographers to make informed decisions about how to capture their subjects effectively, ensuring that the lighting complements the desired mood and enhances the overall composition.
Types of Lighting Techniques
Different lighting techniques can dramatically affect the outcome of your photographs. Hard light creates sharp shadows and can be used to emphasize textures, making it ideal for architectural photography. In contrast, soft light diffuses shadows and can create a gentle, flattering look, which is often preferred for portraits. Backlighting involves positioning the light source behind your subject, creating a halo effect, while silhouette techniques can produce striking images by emphasizing shapes over detail. Each technique serves a unique purpose and can be effectively used in various photography scenarios, allowing photographers to tell a story or evoke emotion through their images.
Natural Lighting
Harnessing natural light can yield stunning results, especially during the golden hour—the time just after sunrise or before sunset. During this period, the sunlight is softer and warmer, creating a magical atmosphere for outdoor photography. The blue hour, which occurs just before sunrise and after sunset, also offers a unique opportunity to capture cooler tones, perfect for cityscapes and landscapes. To maximize the benefits of natural light, photographers can utilize reflectors to bounce light back onto their subjects or experiment with angles to create interesting shadows. My friend, an avid landscape photographer, swears by the golden hour for its ability to transform ordinary scenes into extraordinary images.
Artificial Lighting
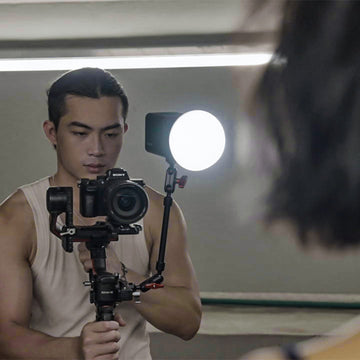
Artificial lighting opens up a world of possibilities for photographers, especially in controlled environments like studios. Flashes can freeze motion and illuminate subjects in low-light conditions, while continuous lighting provides a steady source that allows for real-time adjustments. For portrait photography, a common setup involves using a key light to highlight the subject’s face, with fill lights to soften shadows. In product photography, utilizing softboxes can create even lighting that reduces harsh shadows, making products appear more appealing. I remember attending a workshop where the instructor demonstrated how two simple artificial lights could dramatically enhance a portrait, making it look professionally lit.
Lighting Setups for Different Scenarios
Common lighting setups can significantly enhance the quality of your images. One widely used setup is the three-point lighting technique, which consists of a key light, fill light, and backlight. This arrangement is particularly effective for portrait photography, as it creates depth and dimension. For product photography, a flat lay lighting setup often involves multiple light sources positioned to evenly illuminate the subject from above, minimizing shadows and creating a polished look. Adapting these setups to different environments is crucial; for instance, using available light in a natural setting versus setting up studio lights may require different approaches. My friend, who specializes in product photography, often adjusts her lighting setups based on the background and the texture of the items she is shooting, ensuring optimal results every time.
Mastering Photography Lighting Techniques
In summary, mastering photography lighting techniques is essential for capturing stunning images that resonate with viewers. By understanding the fundamentals of natural and artificial light, exploring various lighting techniques, and employing effective setups, photographers can significantly enhance their work. I encourage you to experiment with different lighting conditions and setups to discover what works best for you. The more you practice and play with light, the more your photography will evolve, allowing you to express your unique creative vision.


