Unlock the Secrets of Studio Lights: Transform Your Photography Game!
Lighting is one of the most crucial elements in photography. It can make or break an image, transforming an ordinary snapshot into a captivating visual story. Studio lights play a pivotal role in achieving that ideal illumination, enhancing the image quality significantly. In this article, we will explore various types of studio lights, including continuous lights, flash lights, and LED lights, each serving its unique purpose in different photography styles. Understanding these options not only sharpens your technical skills but also allows you to express your creative vision more effectively.
Understanding Studio Lights
Studio lights are artificial light sources used in controlled environments to enhance photography. Their primary role is to provide consistent and reliable lighting that can be manipulated to achieve the desired effects. The fundamental principles of lighting involve understanding how light interacts with subjects to create mood, depth, and texture. For instance, soft lighting can evoke feelings of calmness, while harsh lighting may create tension or drama. A well-lit photograph can reveal details that would otherwise be lost in shadows or overexposure, making the choice of lighting critical for capturing stunning images. Over the years, I have witnessed friends struggle with natural light, only to find their passion reignited when they discovered the power of studio lighting. This transition often leads to a newfound appreciation for the art of photography.
Types of Studio Lights
When it comes to studio lights, there are several types to consider, each with its unique characteristics and applications. Continuous lights provide a constant light source, making it easier to visualize the light's effect on the subject in real-time. Flash lights, on the other hand, emit a brief burst of light, ideal for freezing action and creating dramatic contrasts. Finally, LED lights are often favored for their energy efficiency and versatility, finding their way into various photography genres, from portraits to product shoots. Knowing when to use each type can significantly enhance your photographic outcomes and help you adapt to the specific requirements of each shoot.
Continuous Lights
Continuous lights are a popular choice among photographers for their ease of use, especially for beginners. They allow you to see how the light impacts your subject without any guesswork. One advantage of continuous lights is their ability to work well with video, making them a dual-purpose investment for those venturing into videography. However, they can generate significant heat and may not be as powerful as flash lights, limiting their effectiveness in certain scenarios. I remember a friend who used continuous lights for a portrait session; the ability to make real-time adjustments helped him capture a stunning series of shots that truly showcased his subject's personality.
Flash Lights
Flash lights, also known as strobes, are a staple in the photography industry for their ability to freeze motion and create sharp images. Unlike continuous lights, flash lights emit a powerful burst of light for a fraction of a second, allowing photographers to capture fast-moving subjects with clarity. They are excellent for creating dramatic effects, such as high-contrast portraits or dynamic action shots. However, mastering flash lighting can take some time, as it requires an understanding of sync speeds and exposure settings. I recall a workshop where we experimented with flash lighting; the results were astounding, and many participants walked away inspired to incorporate flash into their future projects.
LED Lights
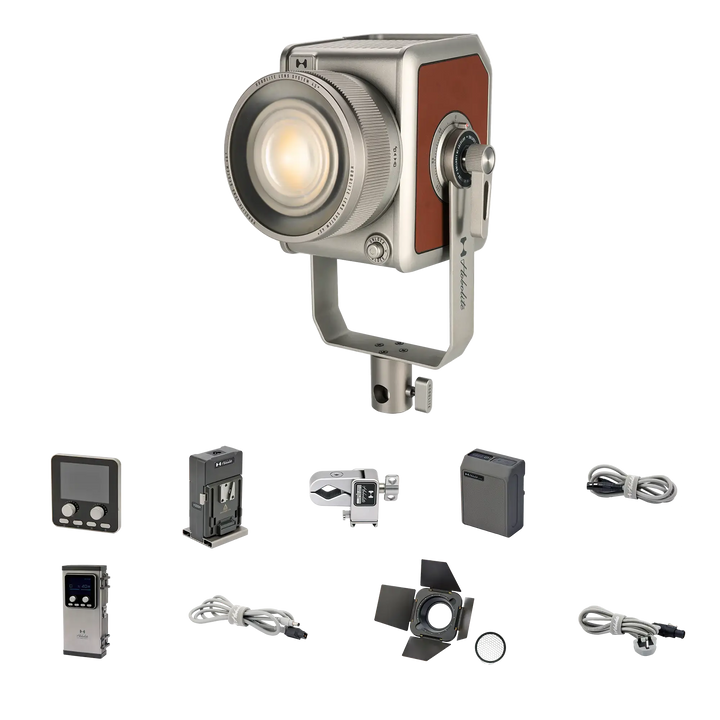
LED lights have surged in popularity in recent years, primarily due to their energy efficiency and versatility. They come in various shapes and sizes, making them adaptable for different studio setups. One of the key benefits of LED lights is their low heat output, allowing for longer shooting sessions without discomfort. Additionally, they can be adjusted for color temperature, enabling photographers to achieve the perfect lighting for their specific needs. LED lights are now commonly used in genres like product photography and portraiture, providing a soft and flattering light that enhances features without harsh shadows. One of my friends recently revamped her studio with LED lights, and the transformation in her work was remarkable.
Lighting Techniques and Setups
Understanding how to effectively use studio lights goes beyond just knowing the types; it involves mastering various lighting techniques and setups. Common configurations include key light, fill light, backlight, and rim light. The key light is the primary source that illuminates your subject, while the fill light softens shadows created by the key. Backlighting can create a stunning halo effect, adding depth to your images, while rim lighting enhances the subject's outline. Experimenting with these setups can yield creative results, and I often encourage photographers to play around with different angles and intensities. One memorable session involved using a combination of backlight and rim light to create a moody portrait that captured the essence of the subject beautifully.
Mastering Studio Lighting Techniques
In conclusion, understanding studio lights and their applications is essential for any photographer looking to elevate their craft. The variety of lighting options—continuous lights, flash lights, and LED lights—each offer unique advantages that cater to different photographic needs. By experimenting with various techniques and setups, you can discover the power of lighting in storytelling through your images. So, whether you're shooting portraits, products, or creative projects, take the time to explore these studio lighting options and watch your photography skills flourish.
