If you’ve ever thought about improving your vehicle’s sound, you’re probably interested in horn upgrades. Upgrading your horn isn’t just about louder noise—it’s about clearer signals, better safety, and sometimes even adding a bit of personality to your ride. But what exactly comes in a horn upgrade kit, and how do you install one without needing a mechanic? Let’s dive into the essentials so you can get the most out of your new horn system.
What Are Horn Upgrade Kits?
A horn upgrade kit is a package designed to replace your factory-installed horn with a more powerful, reliable, or unique-sounding alternative. Standard vehicle horns can often be weak, hard to hear, or just plain generic. When you choose a horn upgrade, you’re looking for something louder, more attention-grabbing, or tailored to your needs—whether that’s safety in traffic or just adding some style.
These kits usually come with everything you need to make the swap smooth and hassle-free. Instead of buying parts separately and hoping they fit, a complete kit takes the guesswork out of upgrading.
What’s Included in a Typical Horn Upgrade Kit?
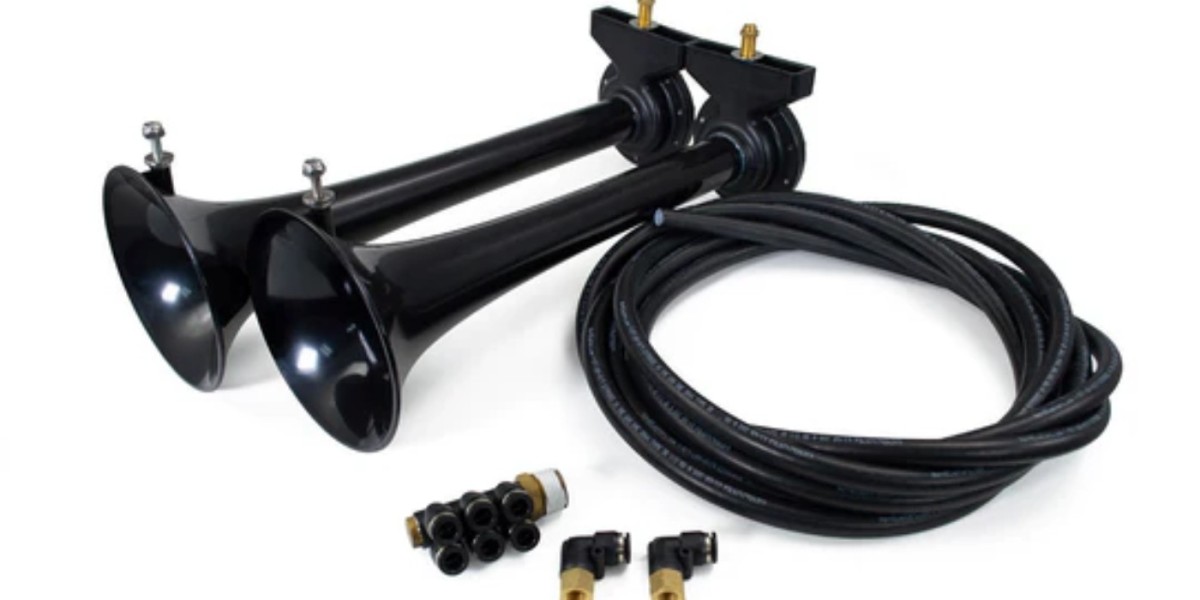
Different kits can vary a little, but here’s what you can generally expect to find inside a horn upgrade kit:
1. The Horns Themselves
Usually, you get one or two horns depending on the style you pick. Many kits feature dual-tone horn upgrades because two different tones together create a more effective, ear-catching sound. Some kits also offer specialty sounds like air horns or musical horns, but the classic is a high/low pair for maximum clarity.
2. Mounting Brackets
To install the new horn, you’ll need brackets that hold it securely in place under your hood or wherever your original horn was mounted. These brackets are custom-fit for common vehicles or adjustable for universal use.
3. Wiring Harness
Since horns require electrical power, a wiring harness with connectors and sometimes a relay is essential. This harness makes sure your new horn integrates safely with your car’s existing electrical system, protecting your circuits and ensuring reliable performance.
4. Relay and Fuse
Upgraded horns often draw more power than factory ones, so a relay and fuse protect your vehicle’s electrical system from overload. The relay acts like a switch, handling high current safely without damaging your horn button or wiring.
5. Installation Instructions
A clear, step-by-step guide helps you install the new horn even if you’re not an expert. The instructions often include wiring diagrams, tips on mounting, and safety precautions.
Some premium kits might also include additional accessories like zip ties for cable management or weatherproof covers for outdoor horn setups.
Why Should You Consider Horn Upgrades?
Your car’s horn is one of the most important safety features. It’s how you warn others of danger, communicate in traffic, or get attention when necessary. Factory horns sometimes lack volume or clarity, especially in noisy environments or busy streets. Here’s why upgrading can make a real difference:
Better Volume and Sound Quality: Upgraded horns are typically louder and clearer, cutting through ambient noise more effectively.
Enhanced Safety: A powerful horn grabs attention fast, reducing the chances of accidents.
Custom Sound Options: You can pick horns with unique tones or musical chimes to personalize your vehicle.
Increased Reliability: Quality kits often use durable materials and components designed to last longer.
Easy Installation: Modern kits come ready with everything you need, making DIY installation straightforward.
How to Use and Install Your Horn Upgrade Kit
Installing a horn upgrade kit might sound tricky, but it’s usually a manageable project, even for beginners. Here’s a simple rundown of the steps involved:
Step 1: Gather Your Tools and Safety Gear
You’ll need some basic tools like screwdrivers, pliers, a wrench set, and possibly a socket driver. Safety gloves and glasses are also a good idea to protect yourself while working.
Step 2: Disconnect Your Battery
Safety first. Disconnect the negative terminal of your vehicle’s battery to avoid electrical shocks or short circuits during the installation.
Step 3: Remove the Old Horn
Locate your factory horn—it’s usually near the front grill or behind the bumper. Disconnect the wiring and unscrew the mounting bracket to take the horn out.
Step 4: Mount the New Horn(s)
Using the brackets supplied in your kit, install the new horn(s) in the original horn’s location or a recommended alternative spot. Make sure the horns are facing downward or outward to protect from water and debris.
Step 5: Connect the Wiring Harness
Follow the wiring instructions closely. Connect the new wiring harness to the horn terminals and then to the car’s power source, usually where the old horn was wired. Don’t forget to attach the relay and fuse if included—they’re vital for safe operation.
Step 6: Secure All Cables
Use zip ties or clamps to keep your wires tidy and away from hot engine parts or moving components. Loose wires can cause shorts or damage.
Step 7: Reconnect the Battery and Test the Horn
Once everything is connected and secure, reconnect the battery. Press your horn button and listen for the new sound. If it doesn’t work, double-check your wiring and connections.
Tips for a Successful Horn Upgrade
Always verify that your new horn is compatible with your vehicle’s voltage (usually 12 volts for cars).
If your horn sounds too weak, check the ground connection. A poor ground can reduce performance.
Use a relay to prevent damage to your horn switch and wiring.
Avoid installing horns where water can pool or damage the unit.
Check local laws—some areas have regulations on how loud or what type of horn you can legally use.
Maintaining Your New Horn
Once your horn upgrades are installed, a little upkeep will keep them sounding sharp:
Regularly inspect the horn and wiring for corrosion, especially if you drive in wet or salty conditions.
Clean the horn openings from dirt or debris that could muffle sound.
Test your horn periodically to ensure it’s working properly.
Final Thoughts on Horn Upgrades
Upgrading your horn is a simple but impactful way to boost your vehicle’s safety and style. With a horn upgrade kit, you get everything necessary for a smooth installation and a better-sounding horn that gets noticed. Whether you want a louder blast for city driving or a custom tone to stand out, these kits offer an affordable and practical solution.
By following the instructions carefully and taking your time, you can install your new horns yourself without professional help. The improved sound and reliability make it well worth the effort. So, if your factory horn has lost its punch or you’re just ready for an upgrade, check out a quality horn upgrade kit today. Your ears—and your safety—will thank you!


