Transform Your Photos: Unleash the Magic of Studio Lights Now!
Lighting is one of the most pivotal elements in photography that can make or break an image. Whether you're capturing a stunning portrait or showcasing a new product, the right lighting can dramatically enhance the quality and impact of your photographs. This is where studio lights come into play. Unlike natural light, studio lights provide controlled illumination that can be adjusted to suit your creative vision. In this article, we will delve into the world of studio lights, exploring the different types available, key factors to consider when purchasing, and tips for setting them up effectively. By the end, you will be equipped with the knowledge to make informed decisions about studio lights and elevate your photography skills.

Understanding Studio Lights
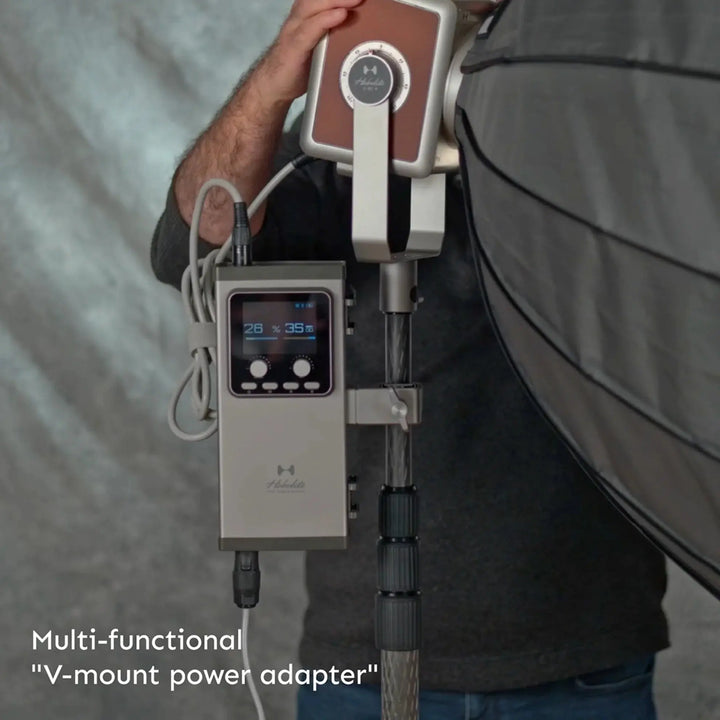
Studio lights are artificial lighting sources specifically designed for photography. They provide consistent and adjustable lighting to enhance the subject being photographed. The two primary types of studio lights are continuous lighting and flash lighting. Continuous lighting, such as LED or incandescent bulbs, allows photographers to see how light affects the scene in real-time, making it ideal for beginners or video shoots. On the other hand, flash lighting produces a brief burst of light, which can create crisp and dynamic images. Each type has its advantages, and the choice between them often depends on the desired effect and shooting conditions. Personal experiences from fellow photographers highlight how switching from natural light to studio lighting has revolutionized their work, resulting in sharper images and better control over their craft.
Factors to Consider When Buying Studio Lights
When investing in studio lights, there are several crucial factors to consider to ensure you get the right equipment for your needs. First is brightness, often measured in wattage. Higher wattage means more light output, which can be essential for larger spaces or when photographing subjects that require strong illumination. Next is color temperature, expressed in Kelvin. A lower Kelvin value (around 3200K) produces a warm light, while a higher value (around 5600K) mimics daylight. This choice can greatly affect the mood and tone of your photos. Additionally, consider light modifiers such as softboxes, umbrellas, and reflectors. These tools can diffuse or direct light, allowing for greater creativity and control. A friend of mine once mentioned how investing in a simple softbox transformed their portrait photography by softening harsh shadows and creating a more flattering light.
Types of Studio Lights for Different Photography Needs
Different photography styles require different lighting setups. For portrait photography, softboxes or umbrella lights are commonly used to create flattering, diffused light that minimizes harsh shadows. In product photography, ring lights are popular for evenly illuminating small objects and enhancing details, making the product appear more appealing. Fashion photographers often utilize a combination of hard and soft lights to highlight the texture of fabrics while still maintaining an attractive look on the model. Each type of studio light can serve a specific purpose, and understanding these nuances can help photographers tailor their lighting to fit the style of their work. A close friend who specializes in product photography swears by using a light tent for e-commerce shoots, stating it dramatically improves the overall presentation of items.
Setting Up Your Studio Lights
Setting up studio lights effectively involves more than just plugging them in. Placement and angles play a critical role in achieving the best results. A common technique is the "triangle lighting" setup, where three light sources are positioned to create depth and dimension. The key is to experiment with the distance and angle of the lights relative to the subject. For instance, placing a light at a 45-degree angle can produce soft shadows that add depth to portraits. Additionally, using reflectors can bounce light back onto the subject, filling in shadows without the need for additional lights. A mentor once advised me to take time during shoots to adjust and experiment with lighting setups, as even minor changes can lead to significant improvements in the final image.
Common Mistakes to Avoid with Studio Lighting
Even seasoned photographers can fall prey to common mistakes when it comes to studio lighting. One frequent error is overexposing the subject due to excessive brightness, which can wash out details and create unflattering images. Another pitfall is neglecting to control shadows, resulting in harsh lines that distract from the subject. It's also crucial to regularly check the color balance of your lights to avoid inconsistencies that can affect the overall look of your photographs. By being aware of these issues and taking proactive steps to address them, photographers can achieve optimal results and enhance their creative output.
Maximize Your Photography with Studio Lights
In conclusion, studio lights are an invaluable tool for photographers looking to elevate their work. By understanding the different types of studio lights and the key factors to consider when purchasing them, you can make informed decisions that align with your photography goals. Effective setup and awareness of common mistakes are essential in maximizing the potential of your lighting equipment. Investing in quality studio lights can truly transform your photography, allowing you to explore new creative avenues and achieve stunning results. So, take the plunge into the world of studio lighting and unlock the full potential of your photographic vision!


